Blender Footage Tracking
You can also read this in: English Deutsch
In this blog I would like to quickly show you how to easily track footage in Blender, and where you can adjust settings to get a better track. In general, it only takes five steps to track footage. We need to prepare Blender for tracking, do the actual tracking (Blender does most of the work for us), clean up a little bit after ourselves, solve the track and finally set up your 3D scene so you can put stuff into your footage. Now let us start with the preparations.
1. Preparations
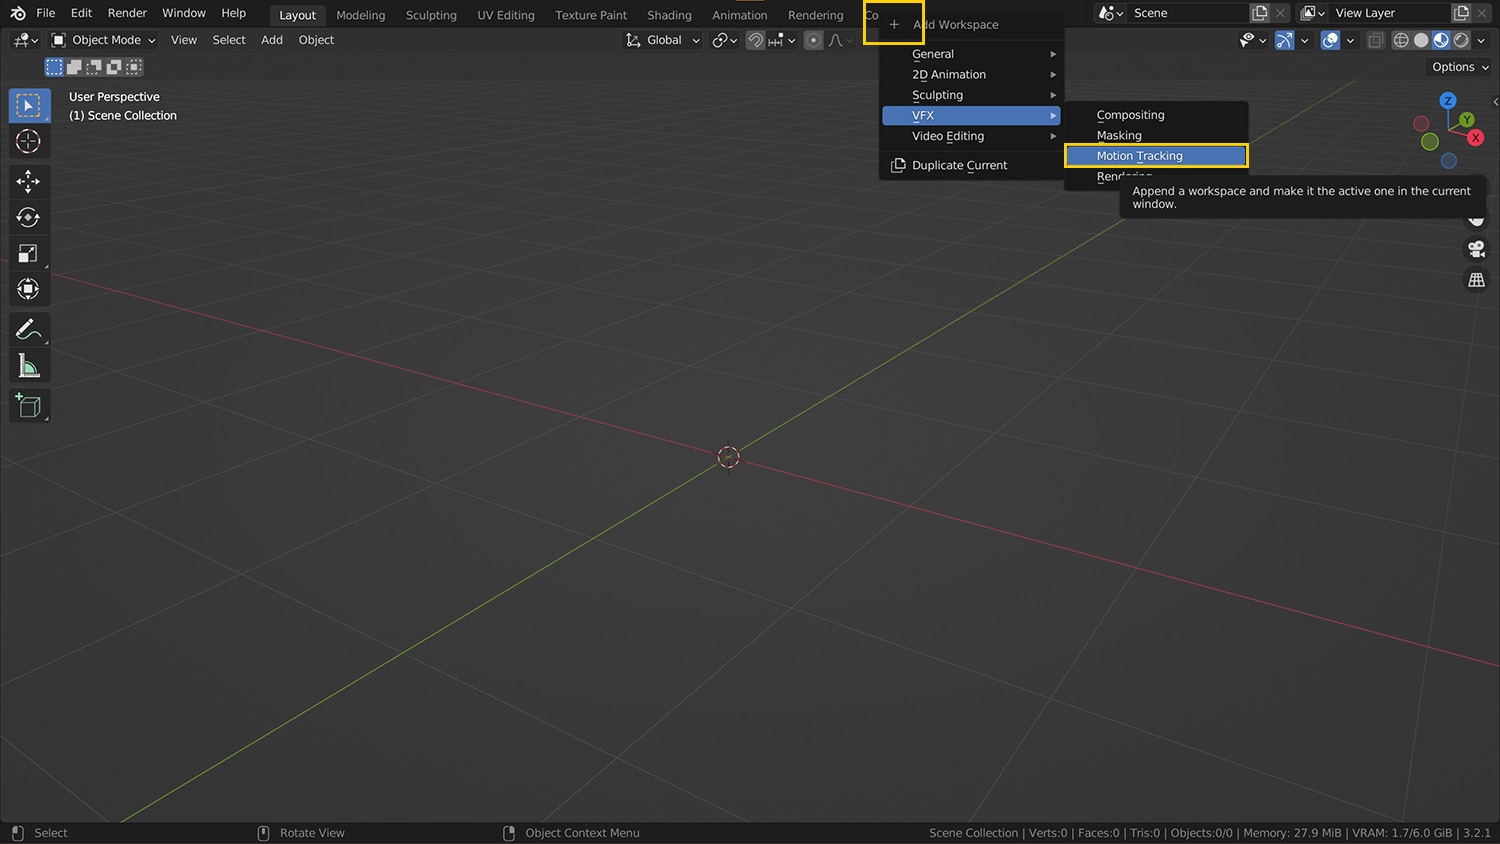
Open Blender and open the Motion Tracking Workspace from the Plus-Icon in the top right corner.
Now switch to the Motion Tracking Workspace and click the Open Button to select the video file that you want to track.

I like to clean up the workspace now so I will remove the top windows (the graph and the 3D viewport) and also the Outliner and Properties windows on the right. I only have the tracking windows showing the video and the Tracking Graph below it.
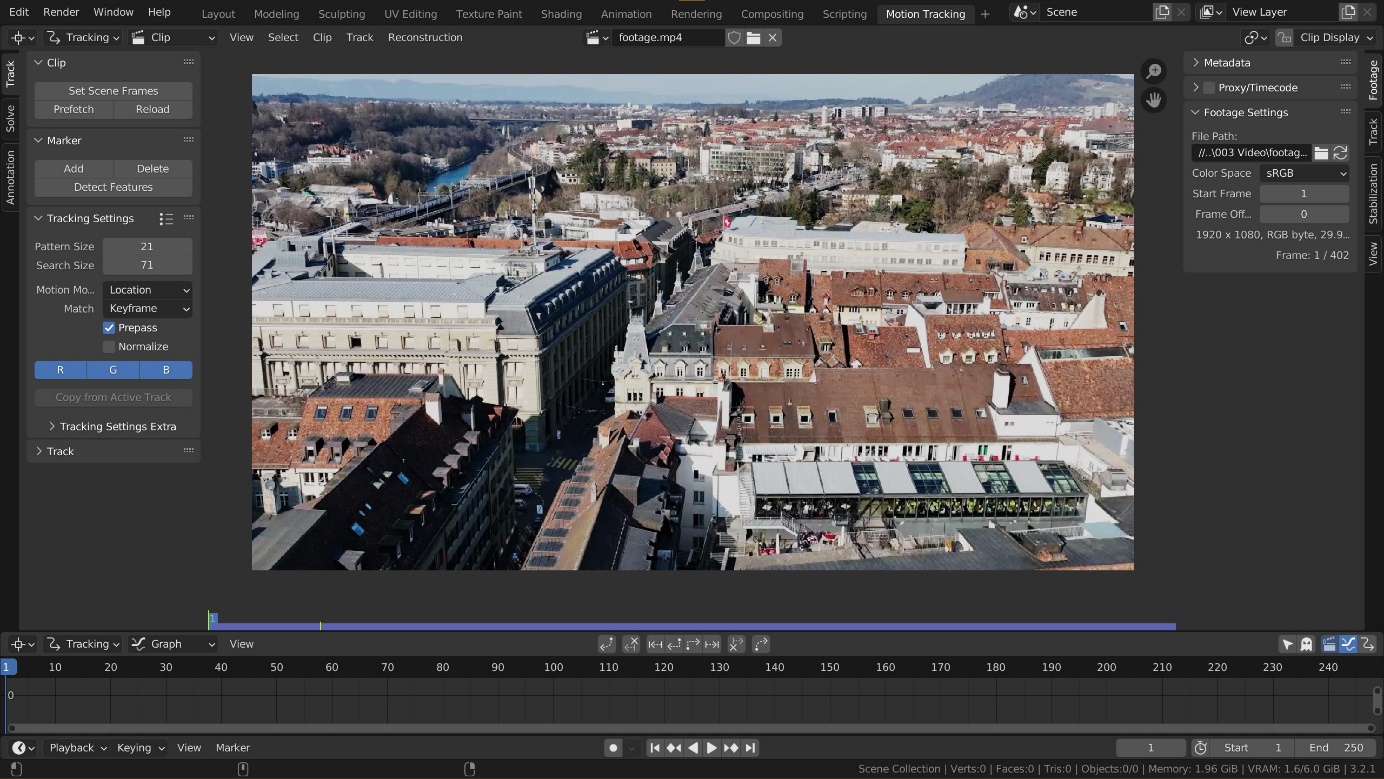
Now to first check some settings before we begin tracking. On the left side within the T-panel (open and close it with t) are the Tracking Settings. In most cases the default settings are fine. But check if your footage fits the Motion Model of the tracking. For my footage Location is fine. If your footage also zooms in/out, you should also select Scale here. More information can be found here.
![]()
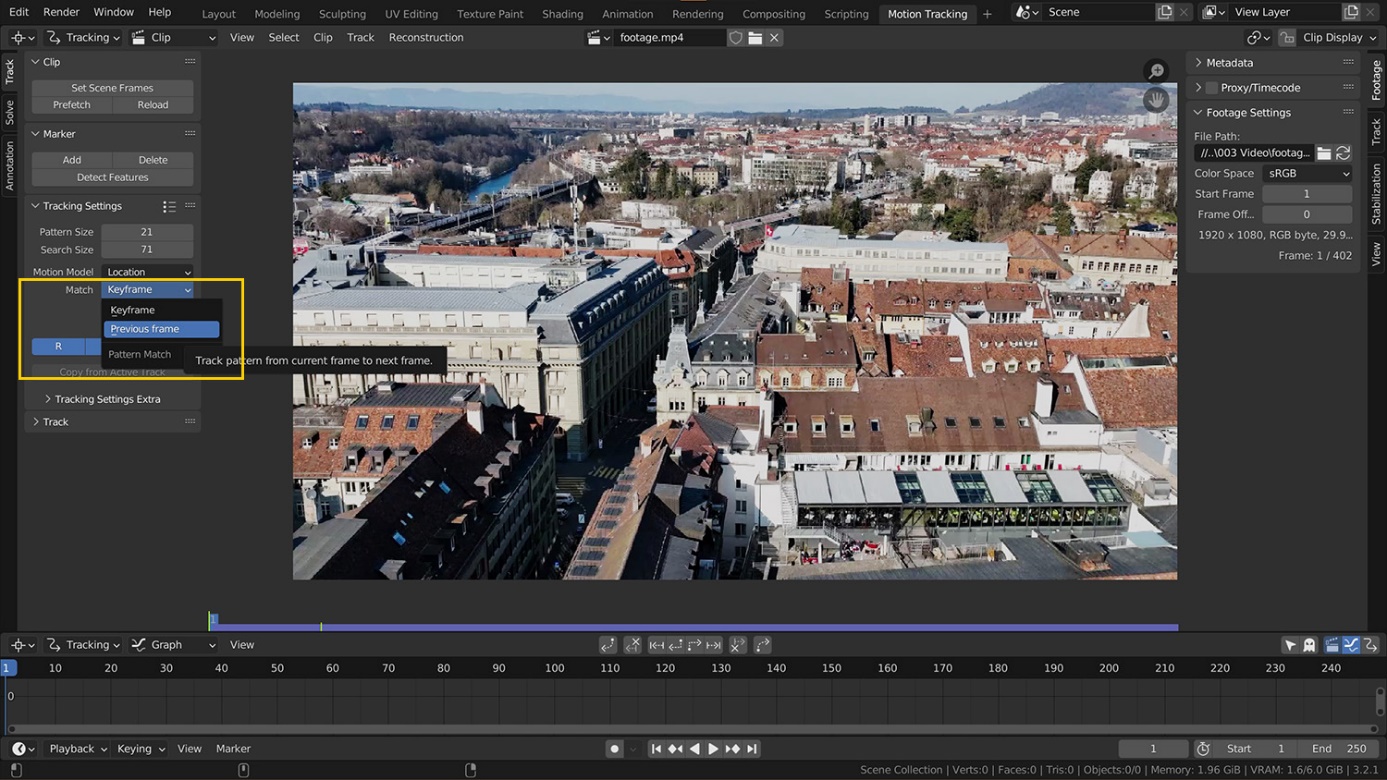
In my footage a drone flies over some rooftops, so I like to change the Match Setting from Keyframe to Previous Frame. This way, while the drone flies along and objects that I track change in shape a little bit during flight, I make sure to continue tracking even if the object being tracked looks totally different from the beginning of the track.
2. Tracking
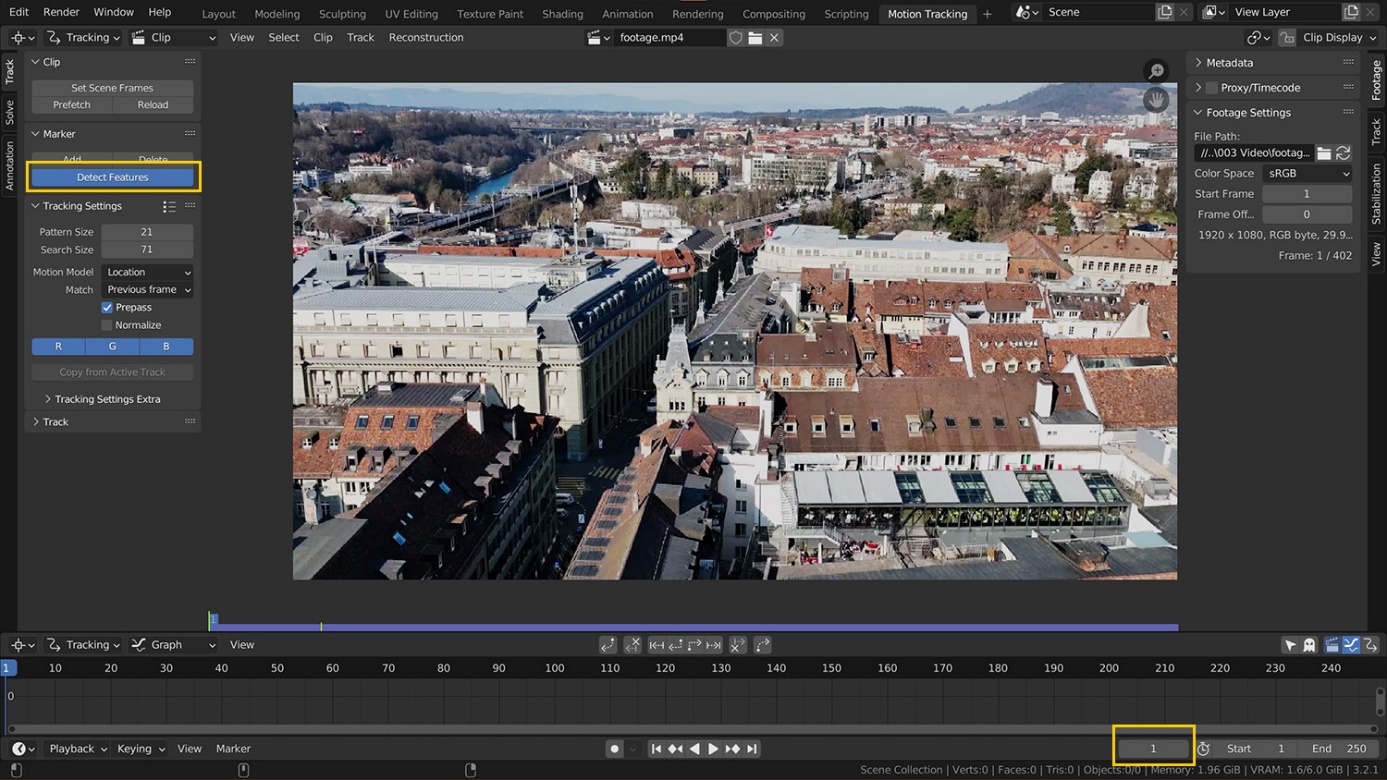
In most cases the quickest way to track is to use Blenders automatic feature detection. Go to Frame 1 and just hit Detect Features. Now Blender will automatically put tracking markers in your footage.
You can fine tune the placement of these as well by opening up the Detect Features Settings Window on the bottom left. The Margin prevents markers from being placed too close to the edge (in case you have some artifacts at your footage borders or something else not belonging to the actual motion you want to track). I’ll leave it at default 16. I’ll also leave the quality Threshold at its default setting and just decrease the Distance between each marker to get more markers.

You can select and deselect the markers like you are used to in the 3D Viewport. You now control the tracking from the Track settings in the left T-panel. To track all selected tracking markers from the current frame forward, hit the Track Markers Button (or Ctrl.-T).
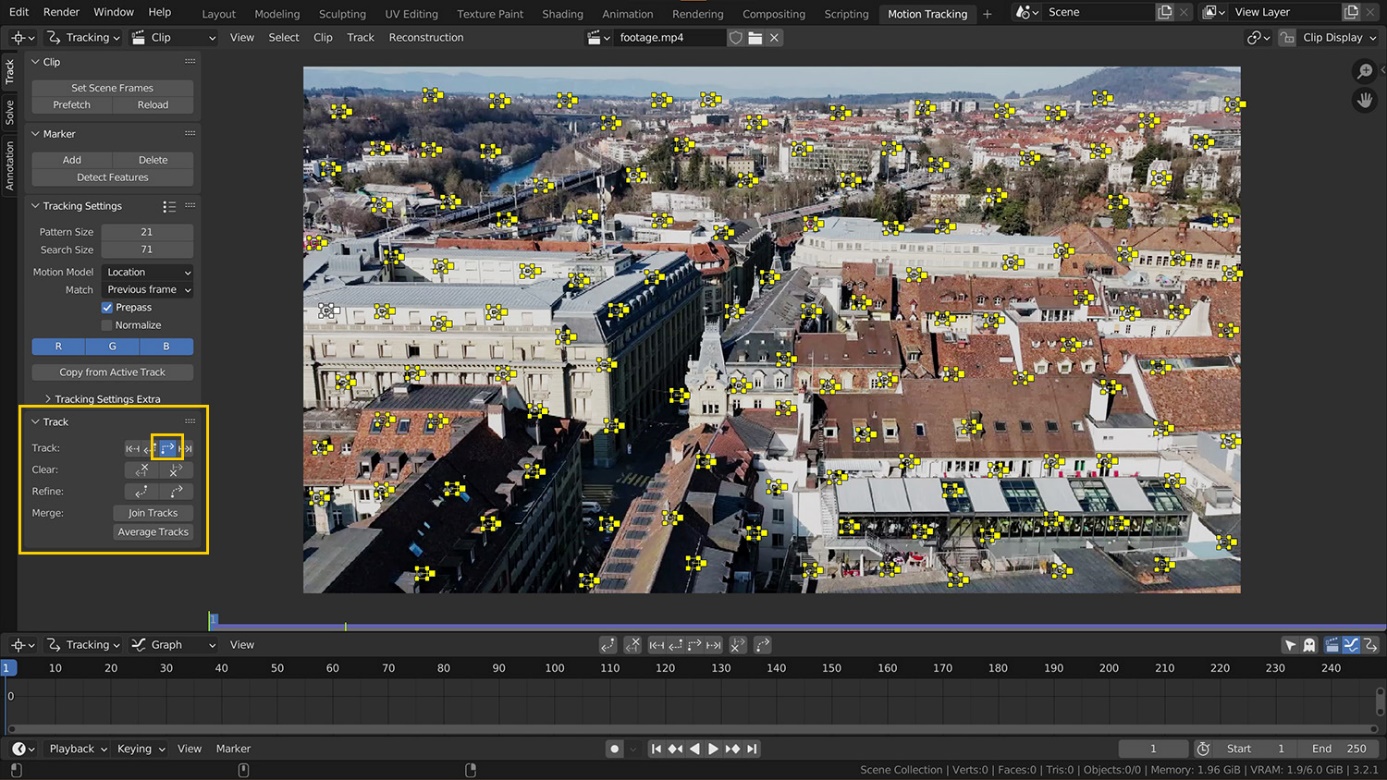
Blender will try to track each of the tracking markers as far as possible and stop once no more markers can be tracked. In my case it reached the end of the footage. If it didn’t in your case, go back a few frames, hit Detect Features again and repeat with the new tracking markers. Until you have the whole length of the footage tracked and you have, at any time in your footage, many tracks at the same time (at least 8, the more the better).
3. Cleanup
Now look at the Tracking Graph and try to remove any runaways. You can click on a line in the graph, and it will highlight the tracking marker in the footage as well (just make sure you are at a frame where you can actually see the Tracking Marker).
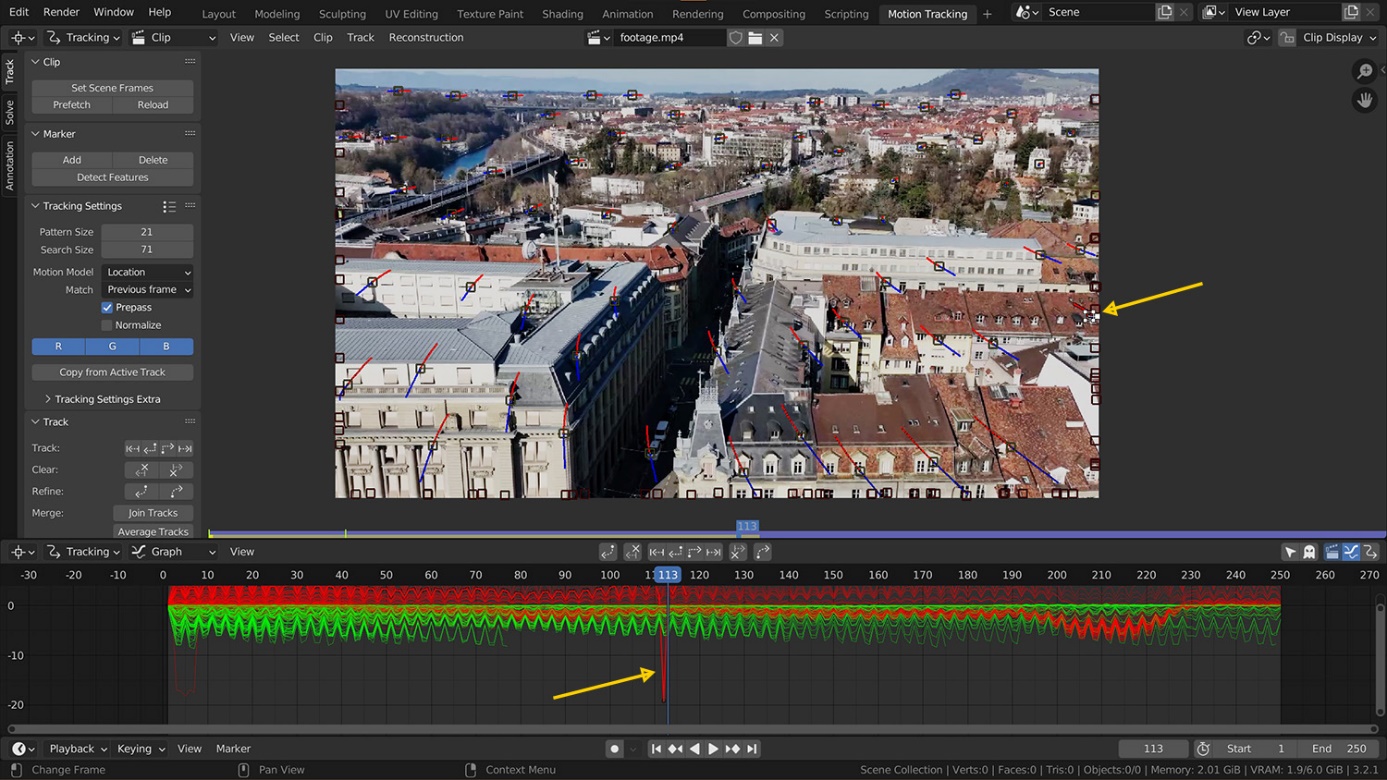
In my case the tracking marker slides along the edge of the footage at the end of its visibility. I go to a frame before that happens and clear the track afterwards by clicking on the Clear Track Path button in the Track Settings on the left.

I repeat the same process for every line in the graph that looks unreasonably out of line. I also look for any markers that might have tracked moving objects, like cars, trains, people, flags, … and delete them.
4. Solving
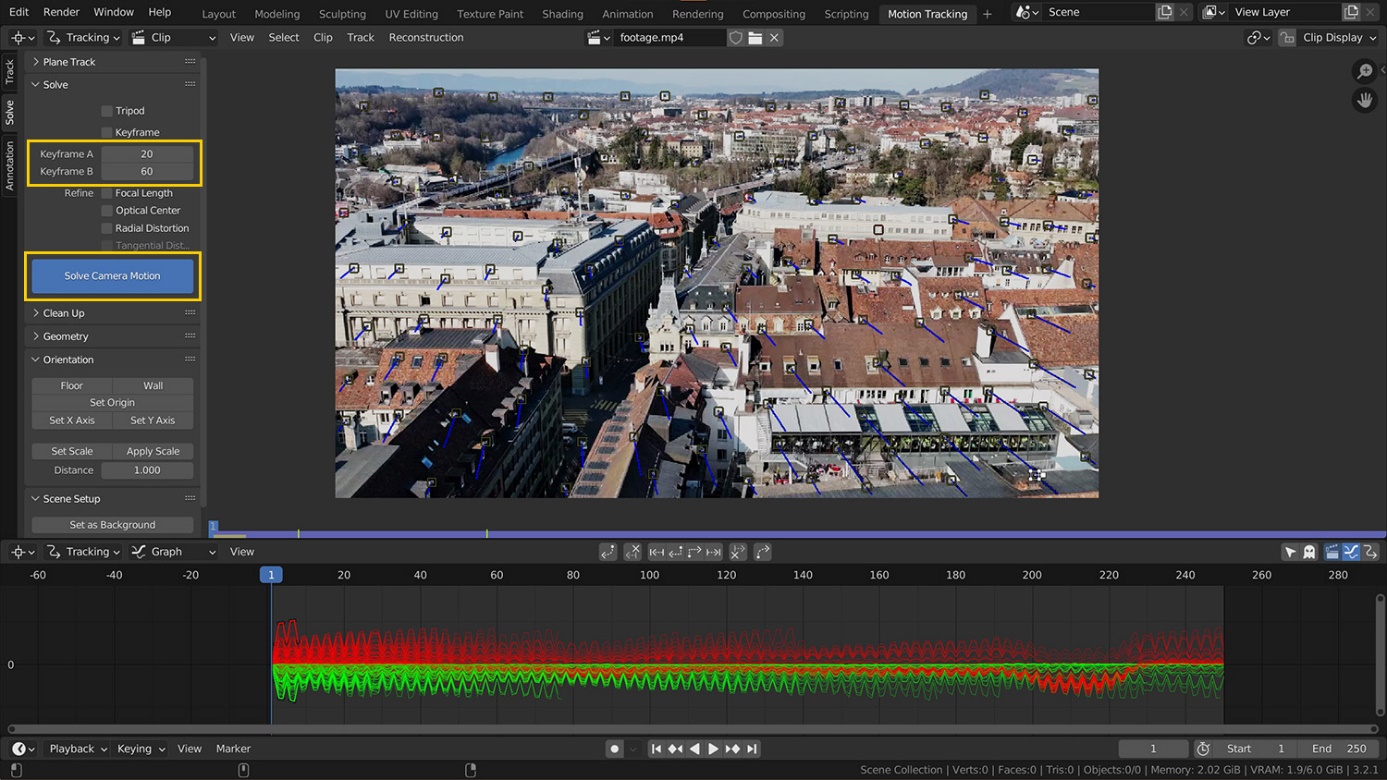
To be able to have actual 3D-data from your markers, we now need to solve our tracking. Change to the Solve-Tab in your T-panel. In the Solve Settings, for Keyframe A and Keyframe B, try to put in a keyframe range where you have a good track for 30 to 50 frames. In my case for example 20 to 60. I’ll leave all other settings on default for now and hit Solve Camera Motion.
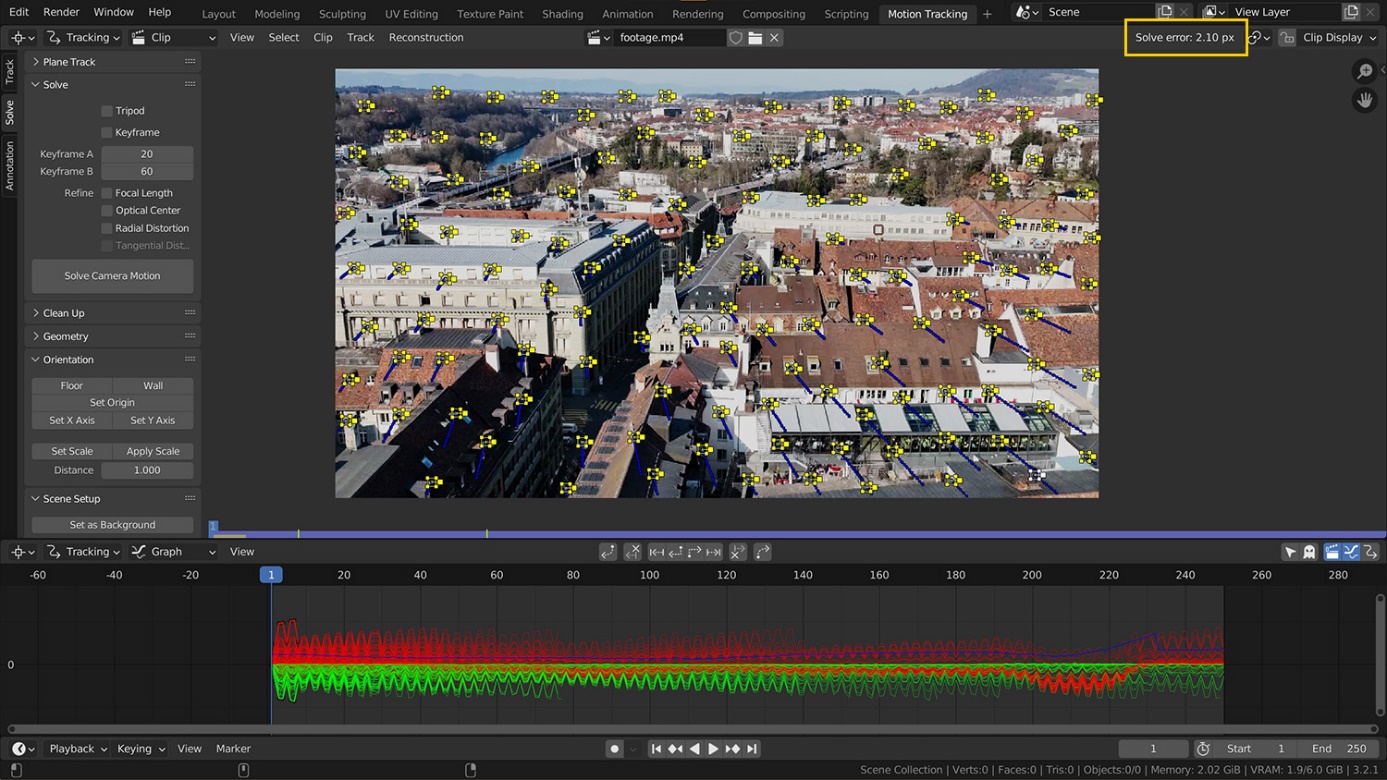
Afterwards Blender will show the Solve error in the top right corner of the window. Under 1px is generally okey, the lower the better. You can also see an additional blue line in the Tracking Graph, this is the average solve error over time. I have a high error at the end of the footage, so I will Detect Features before this part of the footage again, to have more tracking points. The Solve error improved to 1.86px.
To get a better result, you can also investigate each individual tracking marker. Open up another Movie Clip Editor, change it to Tracking and Dopesheet. Here you have a list with all tracking markers and their corresponding error in parentheses. Some of my markers have an error of over 2px and a few even over 6px. You can delete them individually here in the Dopesheet, but you can also bulk delete them in the T-panel Clean Up Settings. Leave the Frames Setting at 0, select Delete Track in the Type dropdown and put in an Error Value above which you would like to remove the tracking markers.
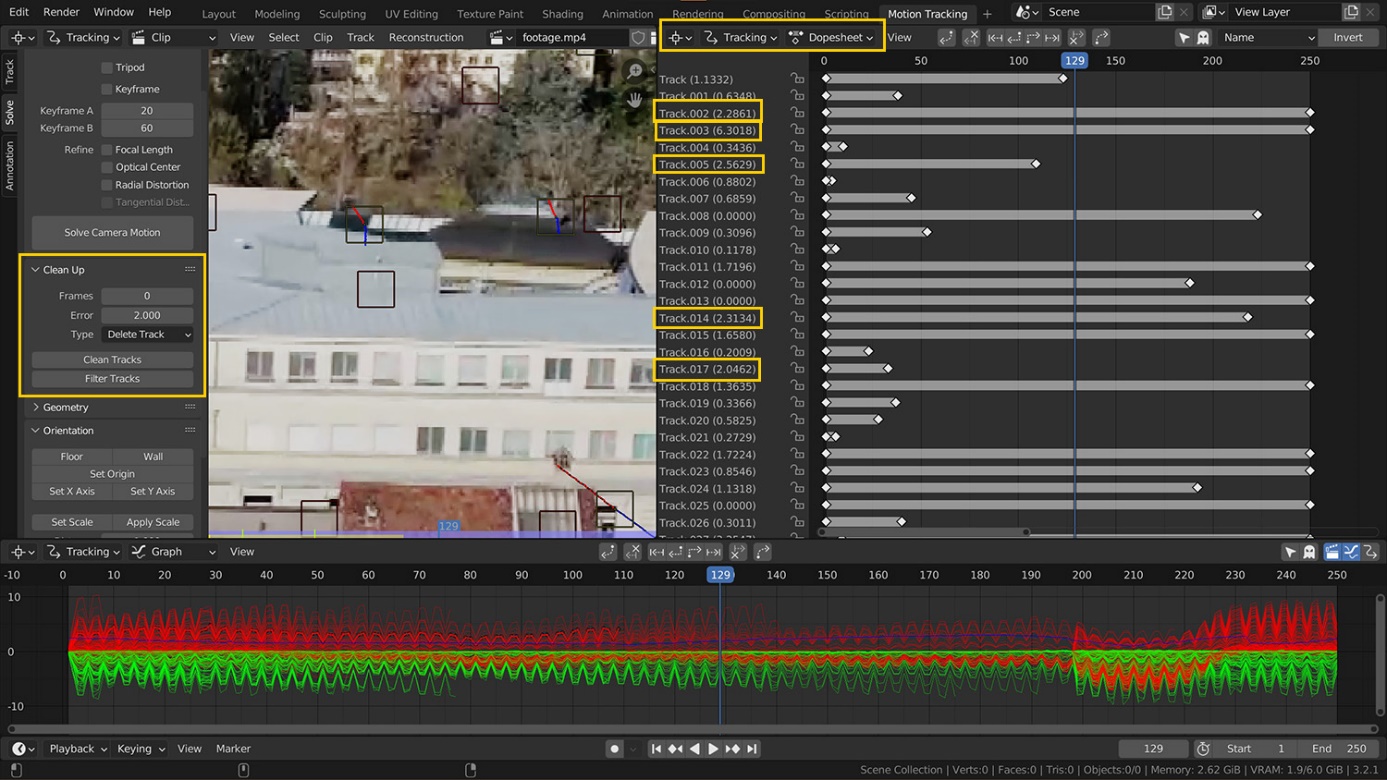
Now hit Solve Camera Motion again and you should get a better result with a lower solve error. If the cleanup removed too many tracking markers, add new ones again with Detect Features, clean them up again and hit Solve Camera Motion again.
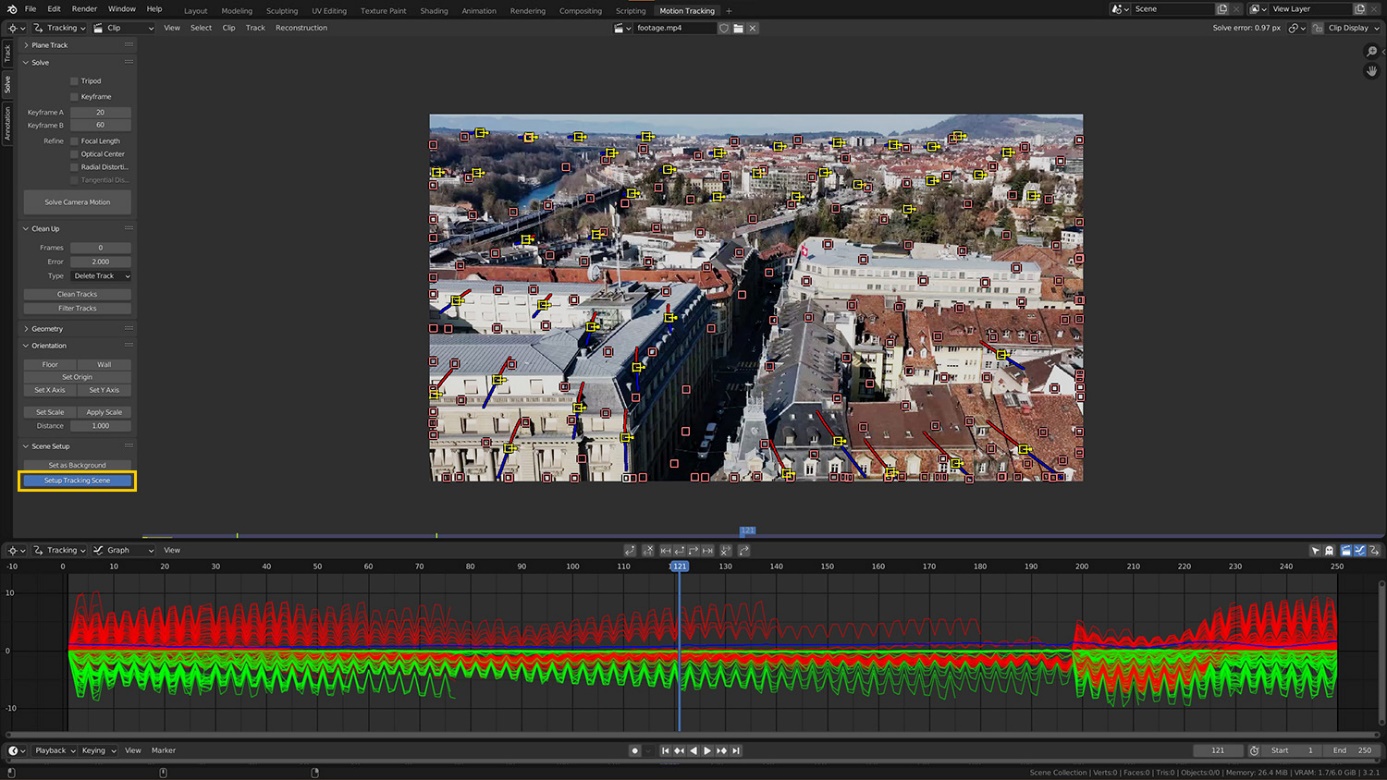
5. Setting up your Scene
Once you have a satisfying track, we can prepare the 3D scene so we can put stuff into our tracked footage. Click Setup Tracking Scene in the Scene Setup settings inside the T-panel.
You can add the 3D Viewport Window into your Motion Tracking Workspace to see what’s happening. Maybe you are already satisfied with the automatic scene setup, but you can tweak it if you aren’t. In the Orientation settings you can define some properties. Select one marker where you like the middle of the scene to be and hit Set Origin. Then I will try to find three tracking markers that are on the floor of my footage (on the street in my case). I’ll select them and then hit Floor. This orients the camera so that these three tracking markers are level with the x- and y-axis. To fit the scale of your footage to the scene scale, you can select two tracking markers where you know the distance between them. In my example I found two markers at two windows, where I estimated that they are about 5 meters apart. So I put 5 into the Distance field and hit Set Scale.
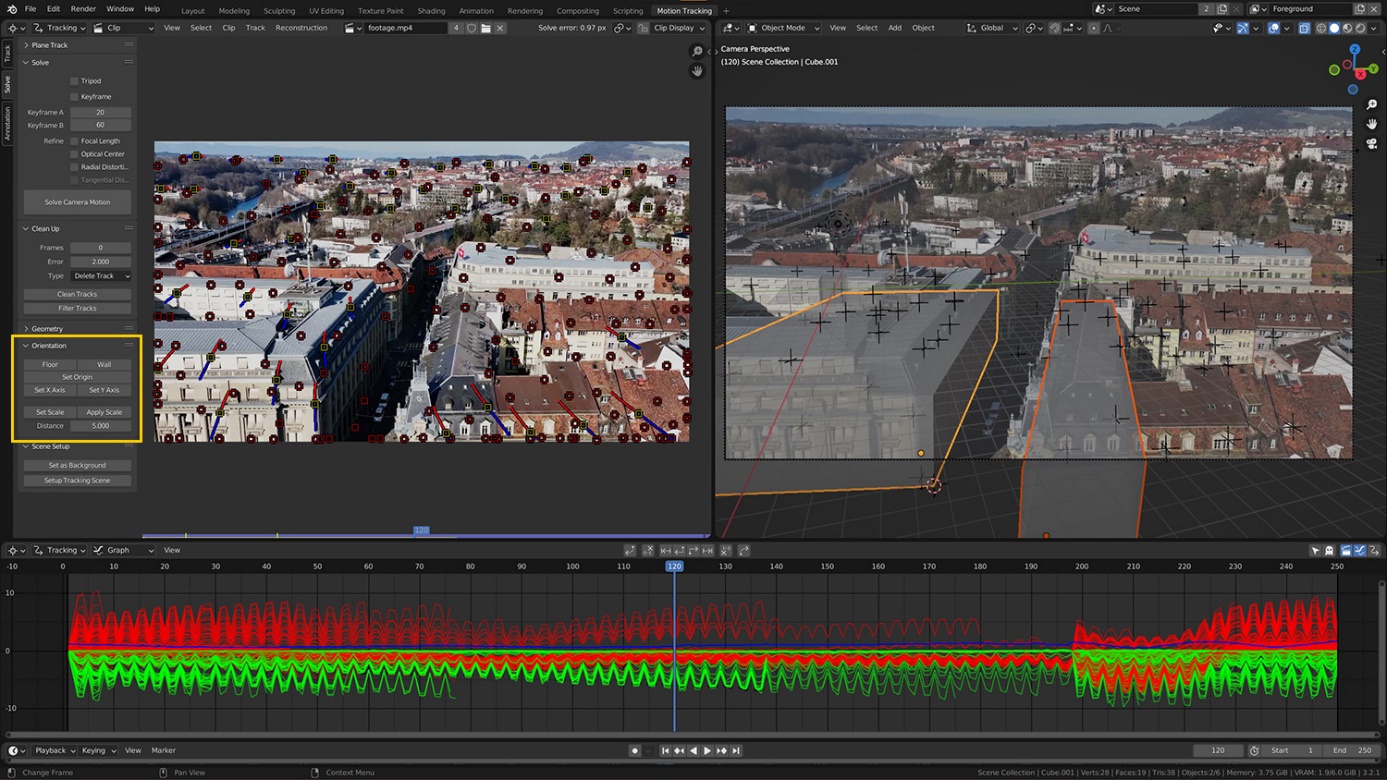
Now you can add your objects into it and the camera will follow the tracked path.
And that’s it. At any time you can put down more tracking markers, change properties of the track, solve again and change the 3D scene setup. Just be aware that all this might change the tracked camera in your 3D scene, so you would have to reposition your 3D objects again.