Rendergate Blender Extension
You can also read this in: English Deutsch
We just released our extension for Blender. With this, you can directly upload your projects to our renderfarm from inside Blender and directly download the resulting images as soon as they are finished. This can significantly speed up downloads.
Table of Contents
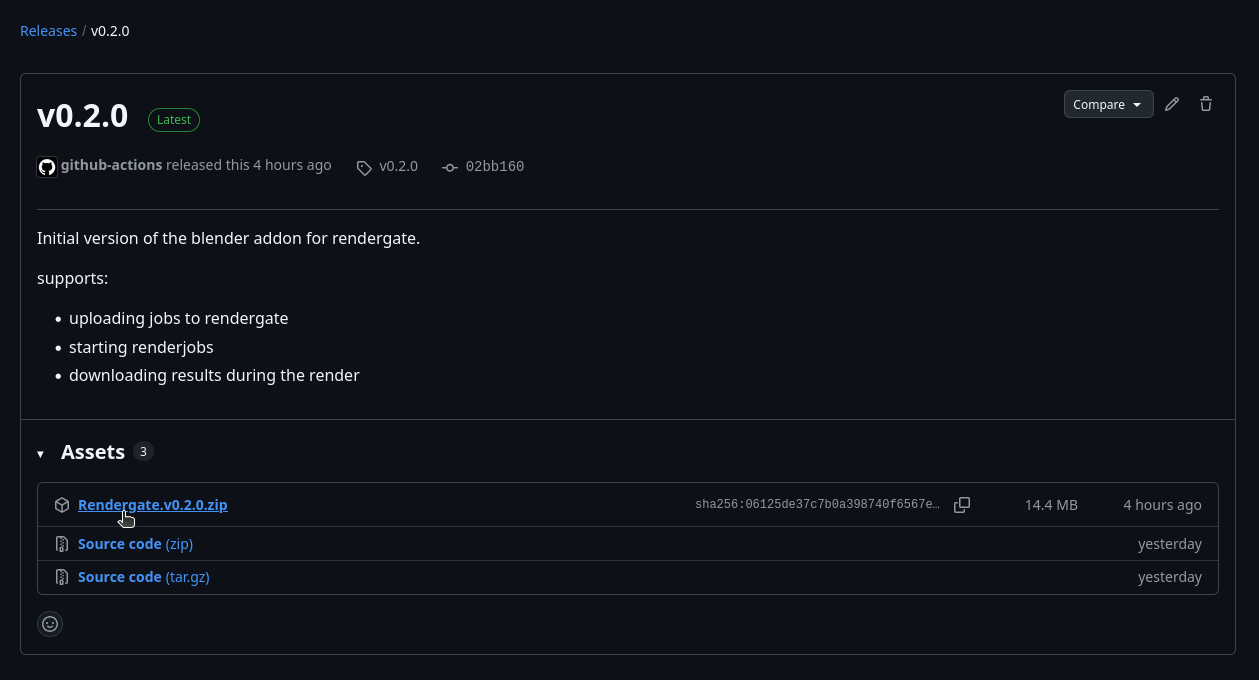
Where to Get It
You can get our extension here. Simply download the Rendergate.v#.#.#.zip file.
Installation
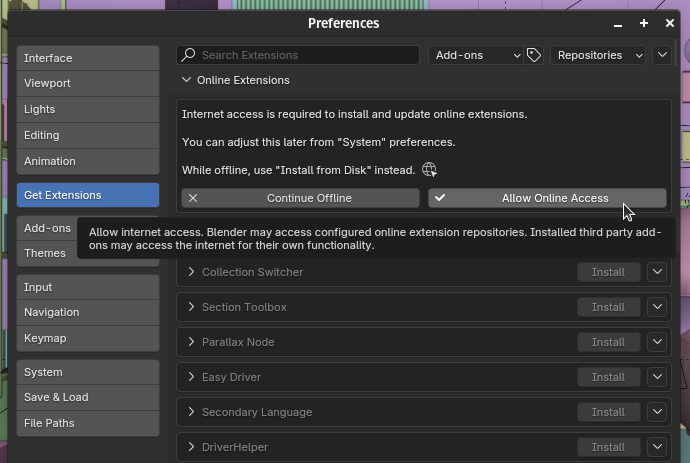
To install an extension from a zip file, open Blender’s preferences (Edit > Preferences...) and go to the Get Extensions tab.
If there is a warning about enabling online access, then click on Allow, as the extension needs to be able to connect to our web services.
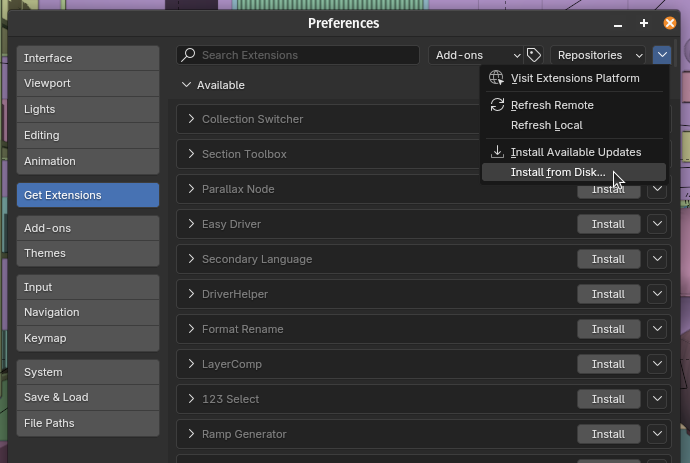
Afterward, you can open the dropdown in the top right corner, which gives you the option to Install from Disk....
After selecting this option, it will open a file dialog where you can select the extension’s zip file you want to install. Here, you need to select the Rendergate.v#.#.#.zip you downloaded.
Afterward, Rendergate should appear in the list under Installed extensions.
Usage
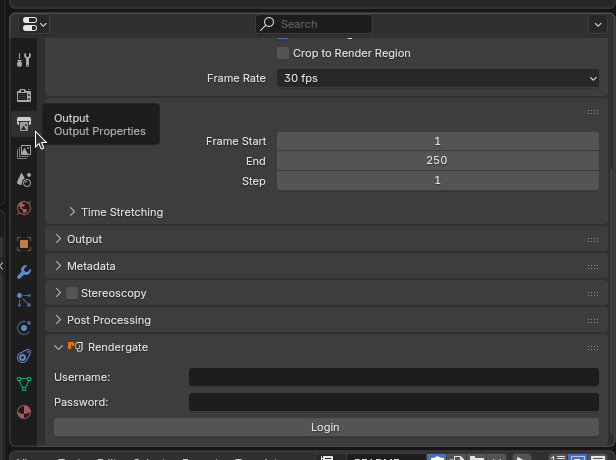
All settings for the extension can be found in the Properties panel under the Output tab. Here, a new expandable panel called Rendergate will have been added.
On first use, you will have to enter your Rendergate account’s email and password to authenticate yourself.
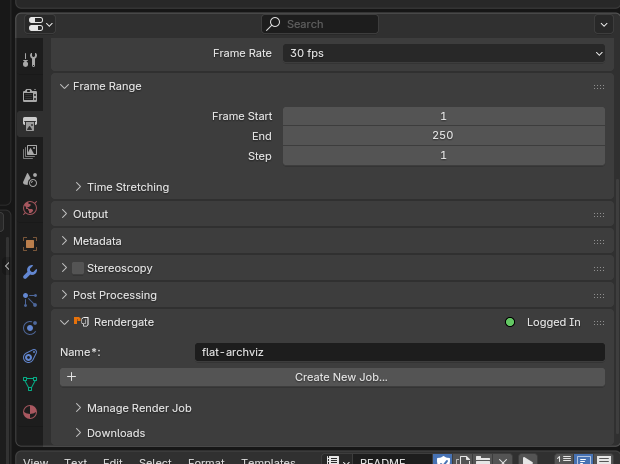
After you have logged in, it should offer you options for creating a new renderjob, managing existing ones and downloading render results.
Starting a Render
To start a render, you first need to upload your file. For this, you need to give it a name and then click on create new job. For you to upload a file, you have to make sure of the following:
- the file has been saved
- all resources have been packed
- to enable this, go to
File > External Data > Automatically Pack Resources
- to enable this, go to
- your file needs to use the Cycles render engine
If all of these conditions are satisfied, then you can click on Create New Job... to upload your file.
After the upload, it will appear under the Manage Render Job menu.
Here, you can also select other renderjobs to render or download.
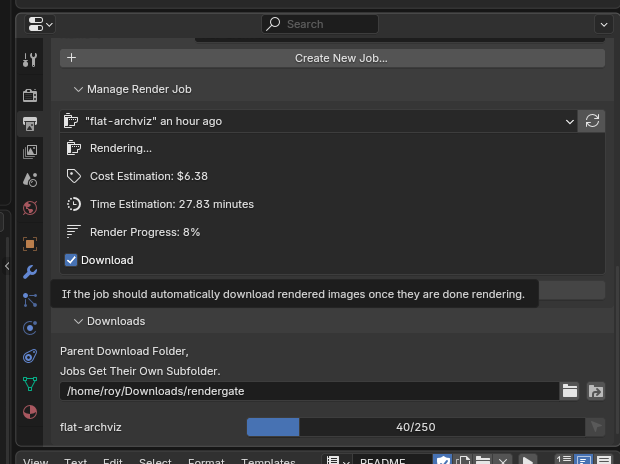
Here it will show you the state of the renderjob. After uploading it, it will be in the calculating stage, where we calculate how long your render is going to take.
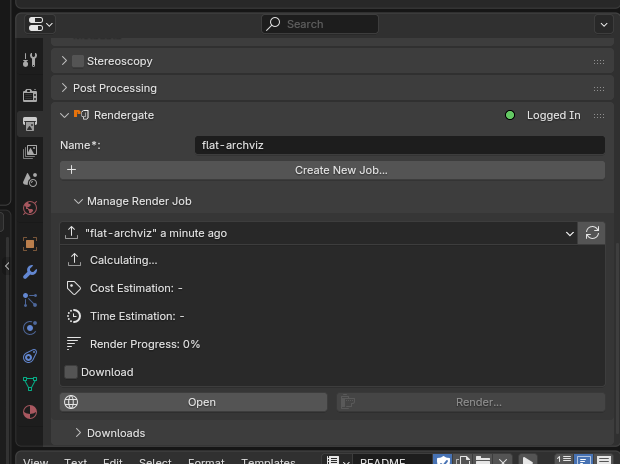
After the calculation is finished, the stage should change to uploaded, where you can start the render. Make sure you have enough credits before starting the render. You can also open the job from here on our website, if you want to change any settings after uploading or don’t have enough rendercredits.
Downloading Results
Before downloading any frames through the extension, you should make sure that the correct download location has been selected. By default, it is ~/Downloads/rendergate, but you can easily change this in the downloads submenu.
After you have selected the correct download path, you can simply check the download checkbox on the renderjob you want to download, it will automatically download all finished images into a new subfolder in the downloads directory. You can even start this download while the render is still going on, this way the images get downloaded as soon as they are available. You can view the download progress under the downloads sub menu.